Foreword:
We are all primarily VFR pilots and know the rules for correctly conducting a flight under visual flight conditions. We stick to them! Personally, I would never entrust my life to, for example, a GY91 chip!
Therefore, the solution presented here can only provide additional safety, but never a guarantee! Every VFRnav pilot must accept that!
Since version 4.15, a major request from many pilots who own a Stratux and fly with VFRnav has been exemplary implemented once again: the integration of an artificial horizon!
A prerequisite for this functionality, however, is that the Stratux system is equipped with the appropriate hardware! The Stratux must have a compatible chipset installed and configured. The classic example is the GY91 with three-axis gyroscope, triaxial accelerometer, triaxial magnetometer + pressure sensor. But other sensors also work.
→ …if not, it can always be retrofitted ![]()
ToDo before start:
As with every classic horizon, the artificial horizon must first be “set”. That means we need to calibrate the sensor with respect to horizon position (aircraft attitude), flight direction (forward), and zero position.
In systems permanently installed in the aircraft, this process is actually only required once and occasionally to compensate for drift. In portable Stratux devices, this process is mandatory after every change of orientation. Therefore, a portable Stratux must be firmly fixed in its position (e.g. with Velcro, etc.).
The “artificial horizon” function is currently detected and enabled automatically.
Calibration:
We navigate to the menu item:
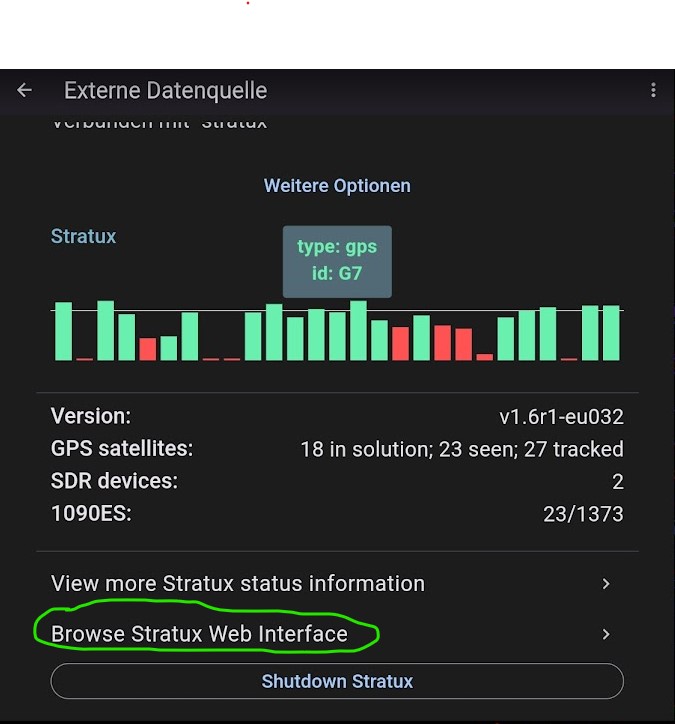
Settings → External Data Source → Browse Stratux Web Interface
After clicking, the Stratux interface opens in the active browser. We are now directly on the Stratux configuration page.
Note: The default IP address of a Stratux is: 192.168.10.1. If a different IP address has been chosen for the Stratux, you can access the web interface by entering that IP address in a browser as well.

Now navigate to Settings → click the Set AHRS Sensor Orientation button and confirm in the pop-up that the installation orientation in the forward flight direction is correct.
Next, go to the GPS/AHRS menu:
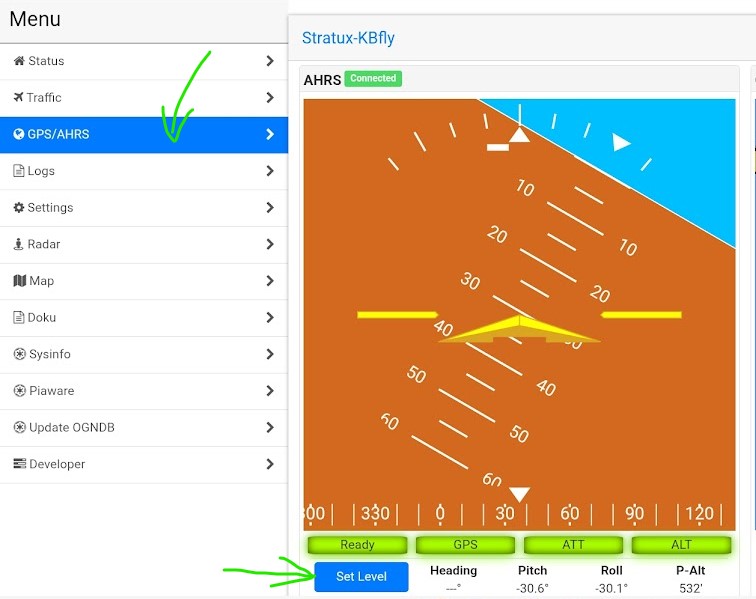
Here we activate the Set Level button …depending on the chipset, calibration can take a few seconds! Neither the Stratux nor the aircraft must be moved during calibration!!!
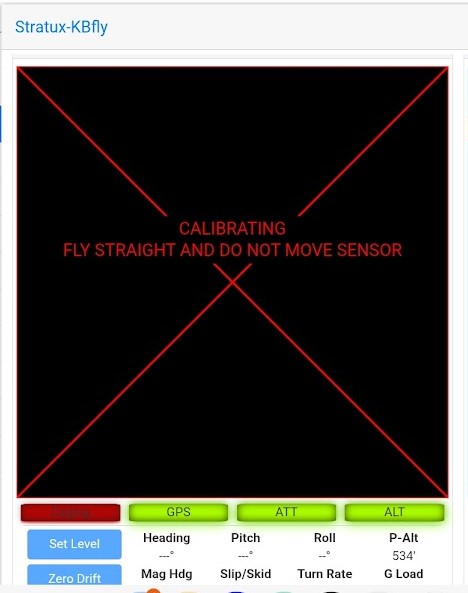
We then perform the same process for the zero position. To do this, we activate the Zero Drift button:
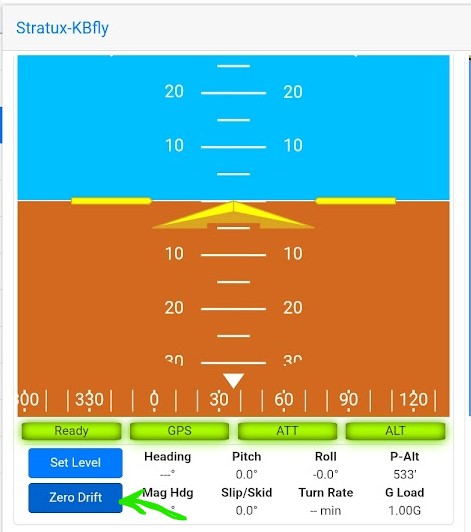
Note: please do not change any other settings in the web interface!
That’s it for calibrating the artificial horizon. A correctly set horizon is now available in VFRnav. Close the browser window and return to VFRnav.
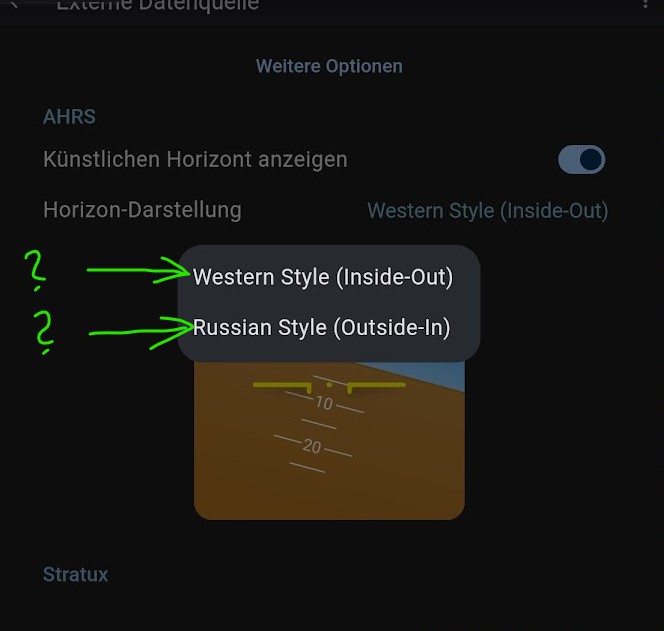
Completely free from any current political situation, you can choose the operating mode of the artificial horizon in VFRnav. Either use the classic Western style, where the horizon (or the Earth) moves and the aircraft remains stable, or choose the Russian style, where it works exactly the other way round (surely something for the old MiG pilots). Personally, I even prefer this variant.
Now we can be delighted with a free artificial horizon in VFRnav ![]()

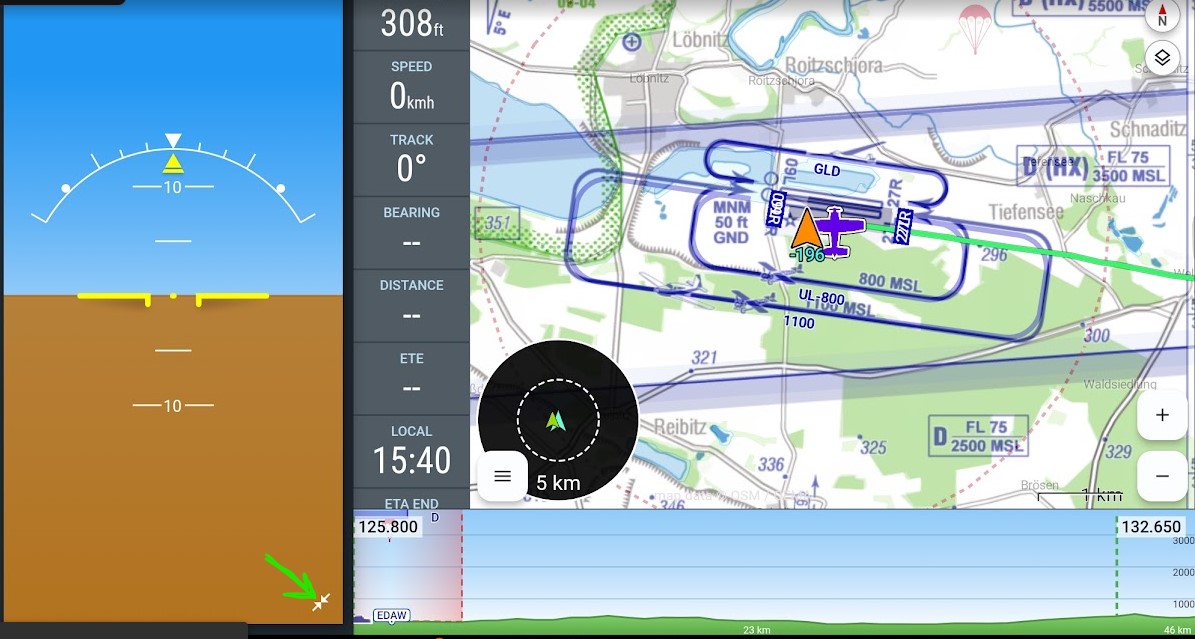
and, by clicking the expansion button (bottom right), change the display style as desired.
Mobile Users:
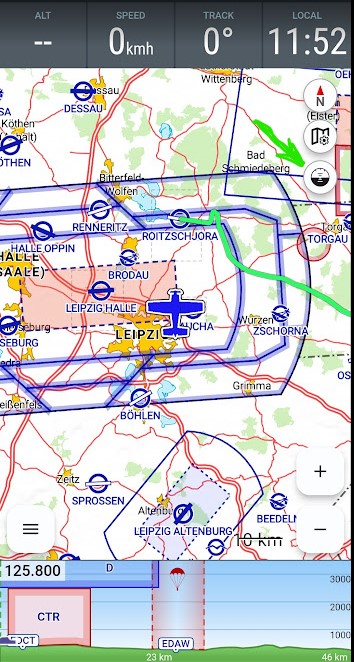
Mobile users of VFRnav can activate the artificial horizon via the symbol on the MovingMap (see green arrow).
I hope I have made the topic of – artificial Stratux & artificial horizon – clear. If you have any questions, feel free to leave a comment.
simply Fly, pilot greetings,
Karsten