Guide: Connecting VFRnav with a TQ KRT2 Radio
Introduction
Starting from version 4.8, VFRnav supports communication with compatible radios. This allows displayed frequencies to be automatically transferred to the radio, eliminating the need for manual frequency input.
To establish communication between VFRnav and the radio, a connection is required. Many radios feature a serial interface designed for remote control applications. VFRnav supports both a wired serial connection and a wireless connection via Bluetooth Low Energy (BLE).
The following guide explains how to upgrade a TQ KRT2 radio with a Bluetooth LE module. The described procedure can also be applied to other devices, though the pin configuration may vary depending on the manufacturer.
Tapping the RX/TX Lines

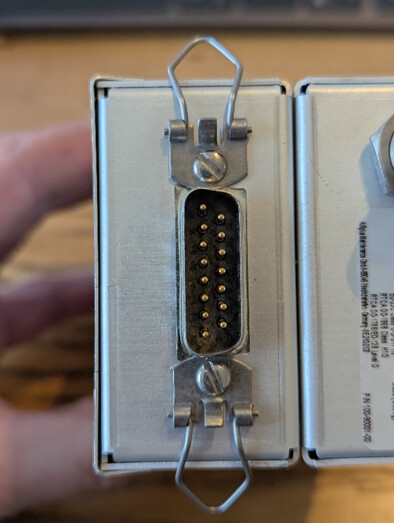
For serial communication, the RX, TX, and ground (GND) lines are required. In the standard installation of the KRT2, the RX and TX pins are not in use and can be accessed directly from the connector.

Bluetooth Module
To enable a wireless connection, a TTL Bluetooth module such as the HM-10, which supports BLE, is required. Alternatively, the BT-1 module can be used, which already includes a level shifter and a voltage converter. This eliminates the need for additional soldering, as all components are housed in a compact casing.
Another advantage: the price! This module is available for around 30 euros on Amazon. Those who do not mind ordering directly from China can get the BT-1 on Aliexpress for half the price (as of March 2025).

The BT-1 module was originally designed for solar inverters but can be repurposed for communication with VFRnav.
Modifying the BT-1 Module
The BT-1 comes with a 5-meter cable and an RJ45 connector. Since only a short cable is needed for this application, it should be trimmed to approximately 30 cm.
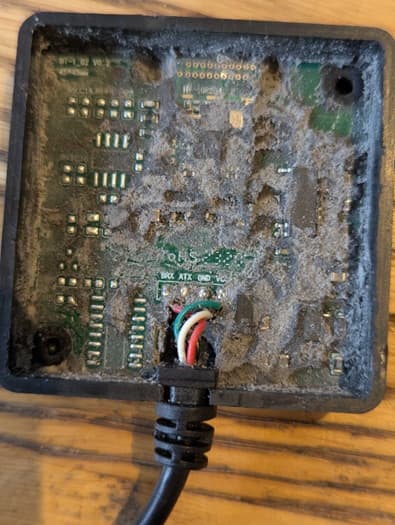

As no official documentation on the cable configuration is available, the BT-1 was opened, and the internal wiring was examined. The wiring assignments are as follows:
- VCC: green
- GND: white
- TX: black
- RX: red
The cable ends must now be connected to the KRT2 connector:
- RX of BT-1 (red) → TX of KRT2 (Pin 2)
- TX of BT-1 (black) → RX of KRT2 (Pin 13)
- VCC (green) and GND (white) → Connect to the 12V power system (Pin 8 and Pin 1 of the KRT2 connector)
Safety Notes
Since the KRT2 is typically protected by a 3A fuse, an additional small fuse should be installed. This can be placed either within the connector or inside the BT-1 housing.
Alternatively, an external fuse can also be used. In this case, only the RX and TX lines are connected to the radio, while the 12V power supply for the BT-1 is provided through a separate circuit breaker or similar component.
Conclusion
With this modification, the TQ KRT2 radio can communicate wirelessly with VFRnav, significantly simplifying operation. The described procedure can be adapted for other radios as needed.
This guide outlines a proven approach but should be adjusted according to individual requirements before implementation.
Note: All modifications are carried out at your own risk. Incorrect wiring may cause damage to the radio.
Note 2: This solution works with VFRnav and is not compatible with SkyDemon or SkyMap.